This article has been recently updated to reflect the recent deployment of Perp V2 on Optimism.
I recently released “A Complete Guide to Perpetual Protocol V2” which if you haven’t read already, then what are you playing at? Just kidding, but anyway... I thought it would be best to release a tutorial on how to use the new V2 - Curie. Currently, V2 is on the Optimism testnet - This is just an EVM compatible environment where dapps that are set to deploy on Optimism can try out their new updates without having to push it live.
It is a great test environment that allows paper-USDC to be used to execute trades so that no funds are at risk whilst the final finishing touches are being made to the protocol.
It goes without saying but following the mainnet launch, Perpetual Protocol V2 will be live on Optimism.
Whilst this tutorial will go through how to operate on Perpetual Protocol V2, for obvious reasons the images used will be taken from the testnet.
Right so before we get started, you will need the following:
- Web3 Wallet - Preferably Metamask on your desktop browser.
- USDC (We will use paper-USDC in the test environment to replicate this)
- Erm… that’s about it… simple.
Step 1 -
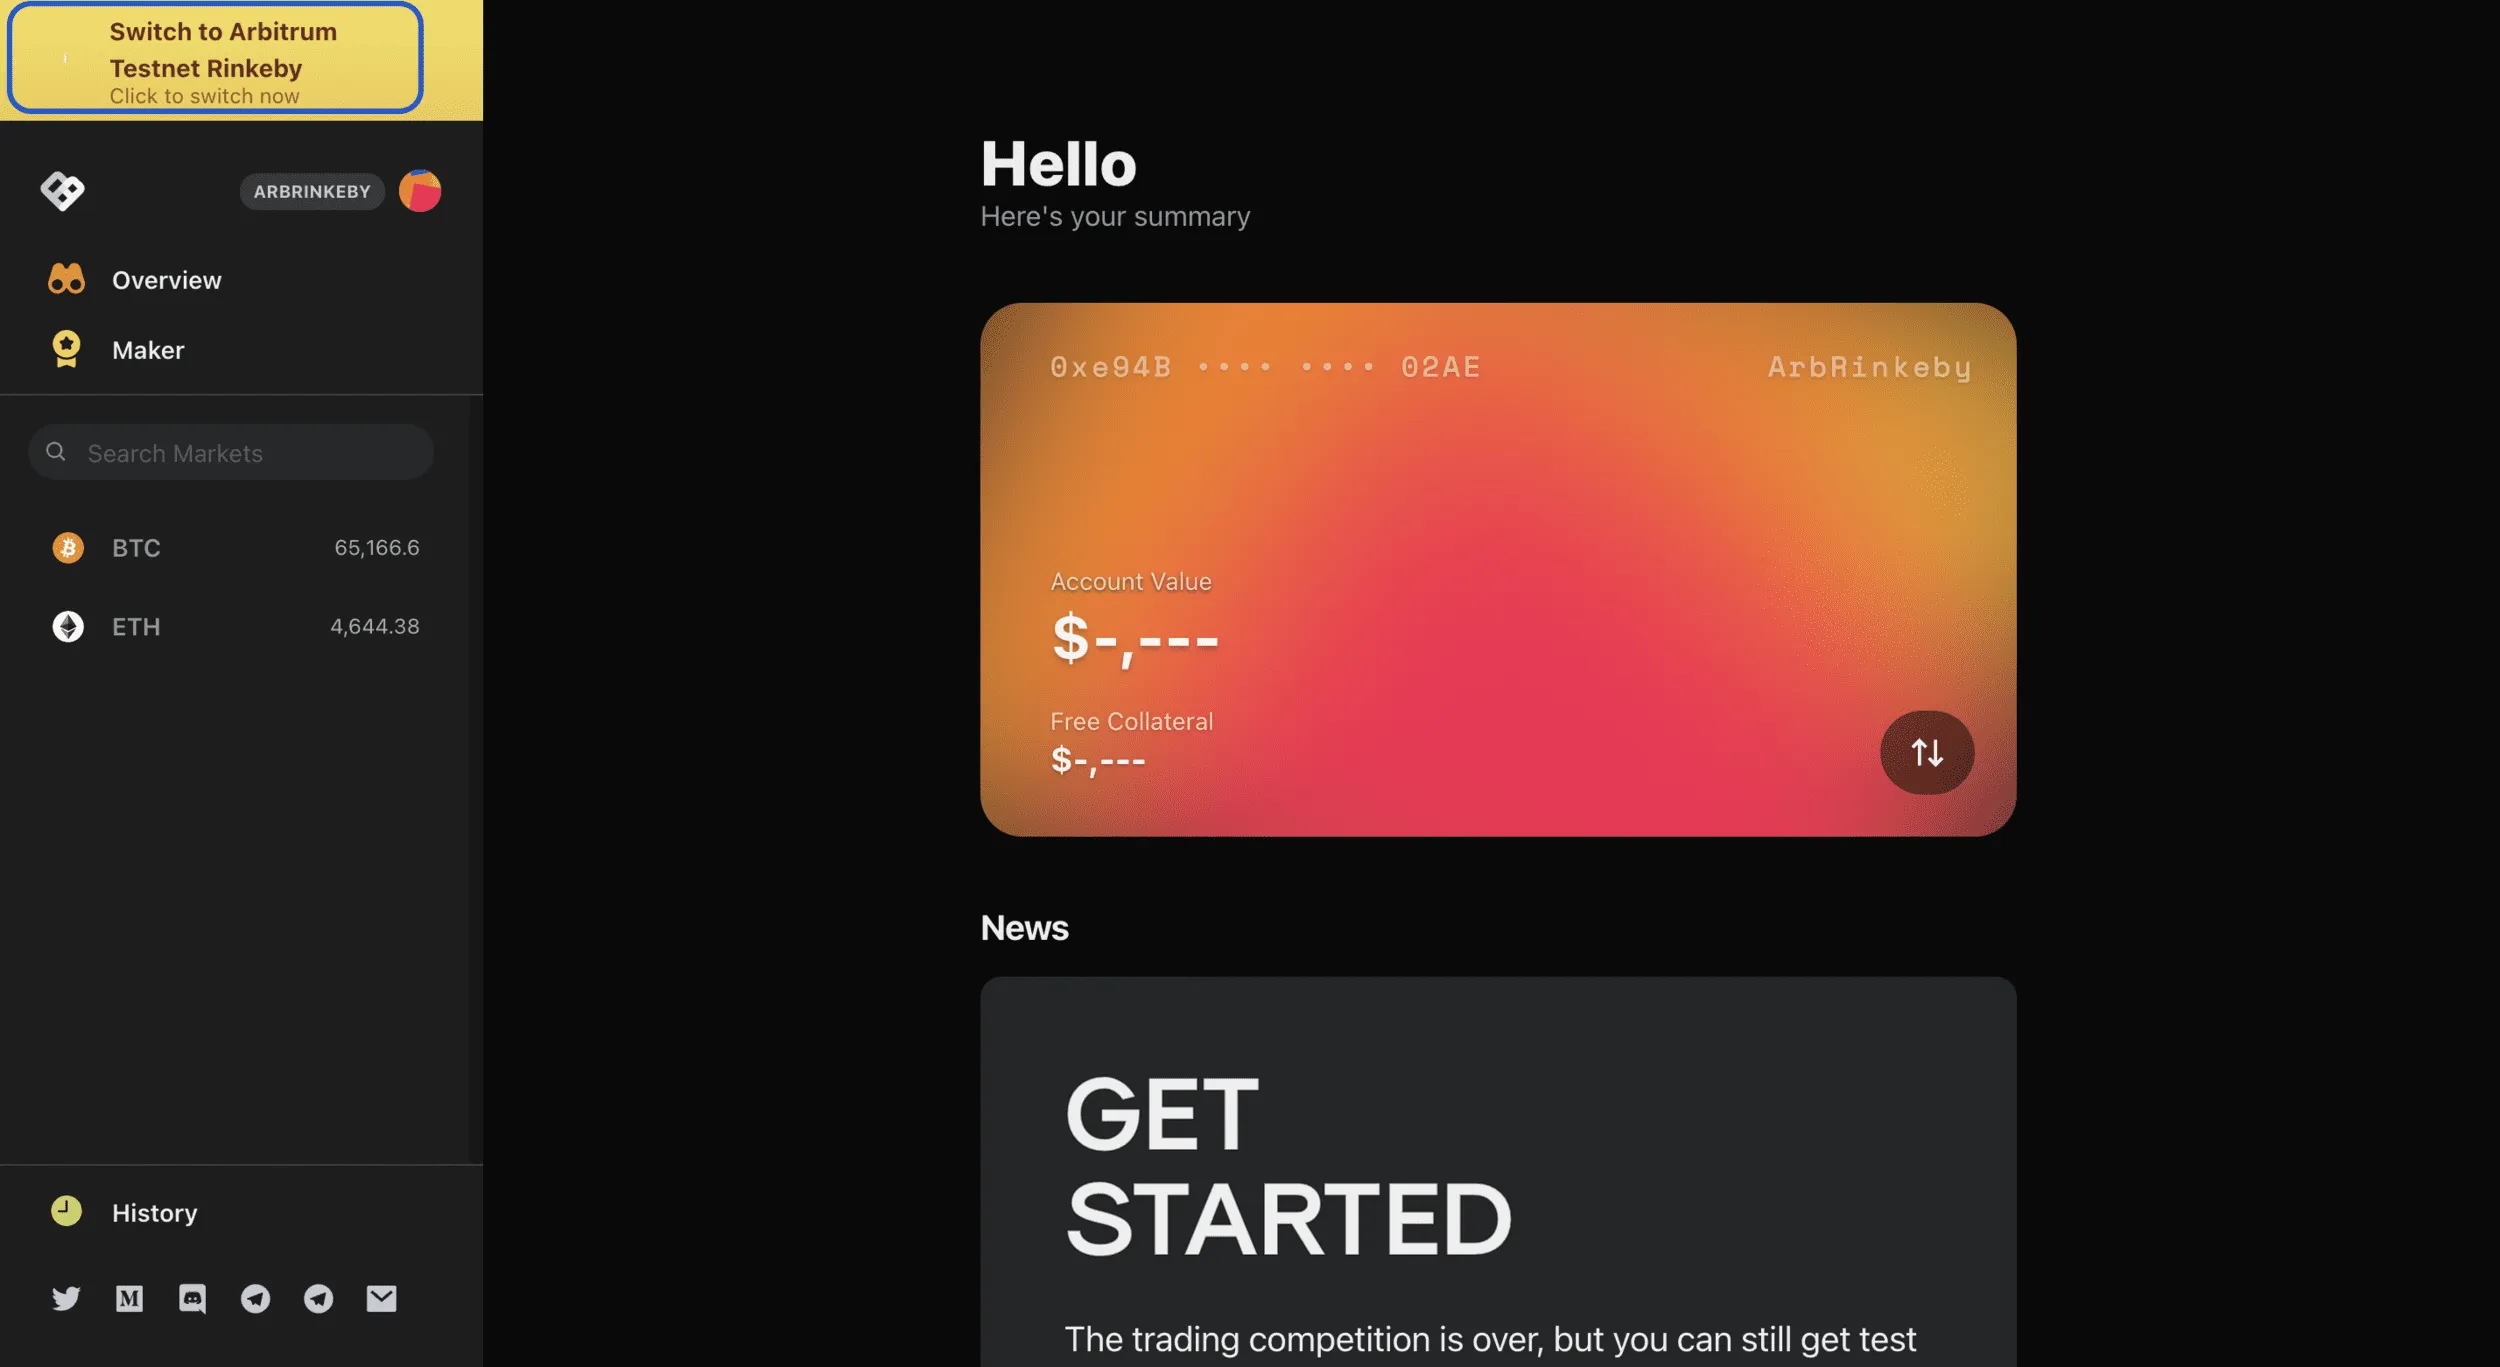
So the first step is to head to https://testnet.perp.exchange/ and connect your Metamask. Once the mainnet goes live I will update this article to ensure that the correct link is available.
You will be prompted to configure your Metamask to the Optimism testnet environment. This will be done automatically, so no need to add a custom network.
Again, once the mainnet goes live, this will just connect directly to your Metamask which should be configured to Optimism.
If you would like to configure Metamask to Optimism beforehand, you can do the following:
Click on the Metamask extension > click on “Ethereum Mainnet” network > click on “Custom RPC” at the end of the menu, and enter:
Network name: Optimistic Ethereum
RPC URL: https://mainnet.optimism.io
Chain ID: 10
Currency: ETH
Explorer: https://optimistic.etherscan.io
Block Explorer URL: https://arbiscan.io
It is always best practice to verify this configuration information before confirming.
Step 2 -
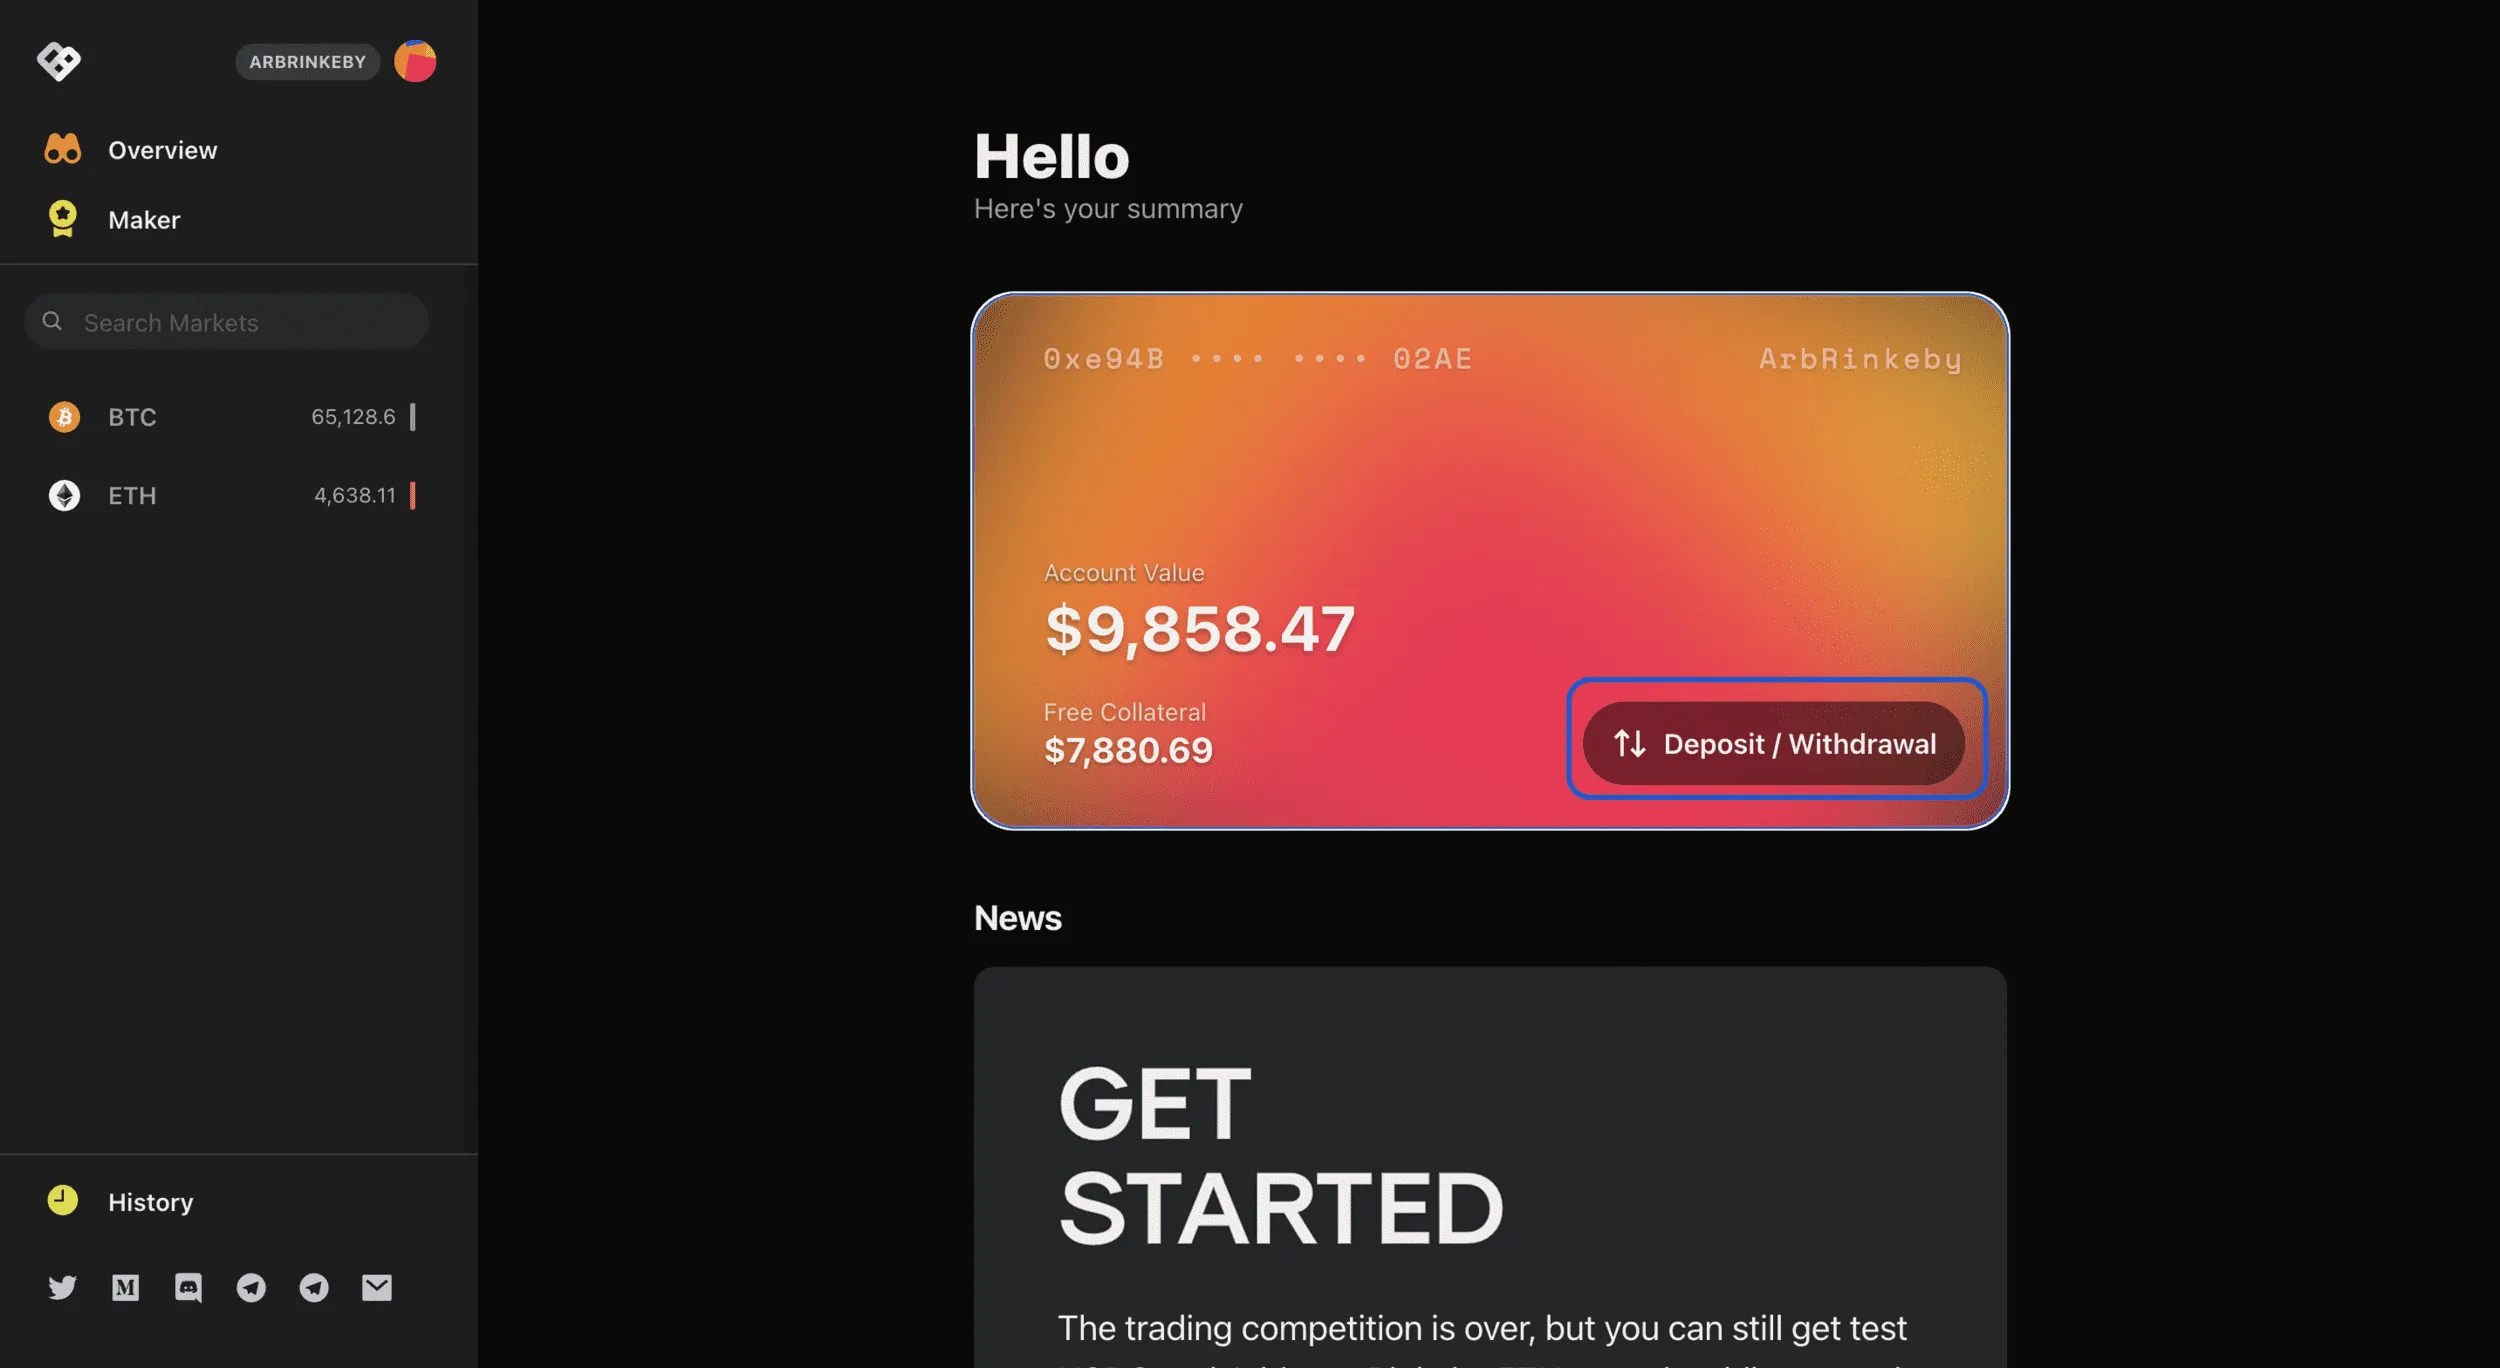
Once connected, you will land on the Overview page. This is where you can “deposit” your USDC.
Clicking deposit USDC would then send your USDC to the Clearing House. This is where you deposit your collateral. Following this, you can then direct the funds to open a long or short position.
On Testnet -
Step 3 -
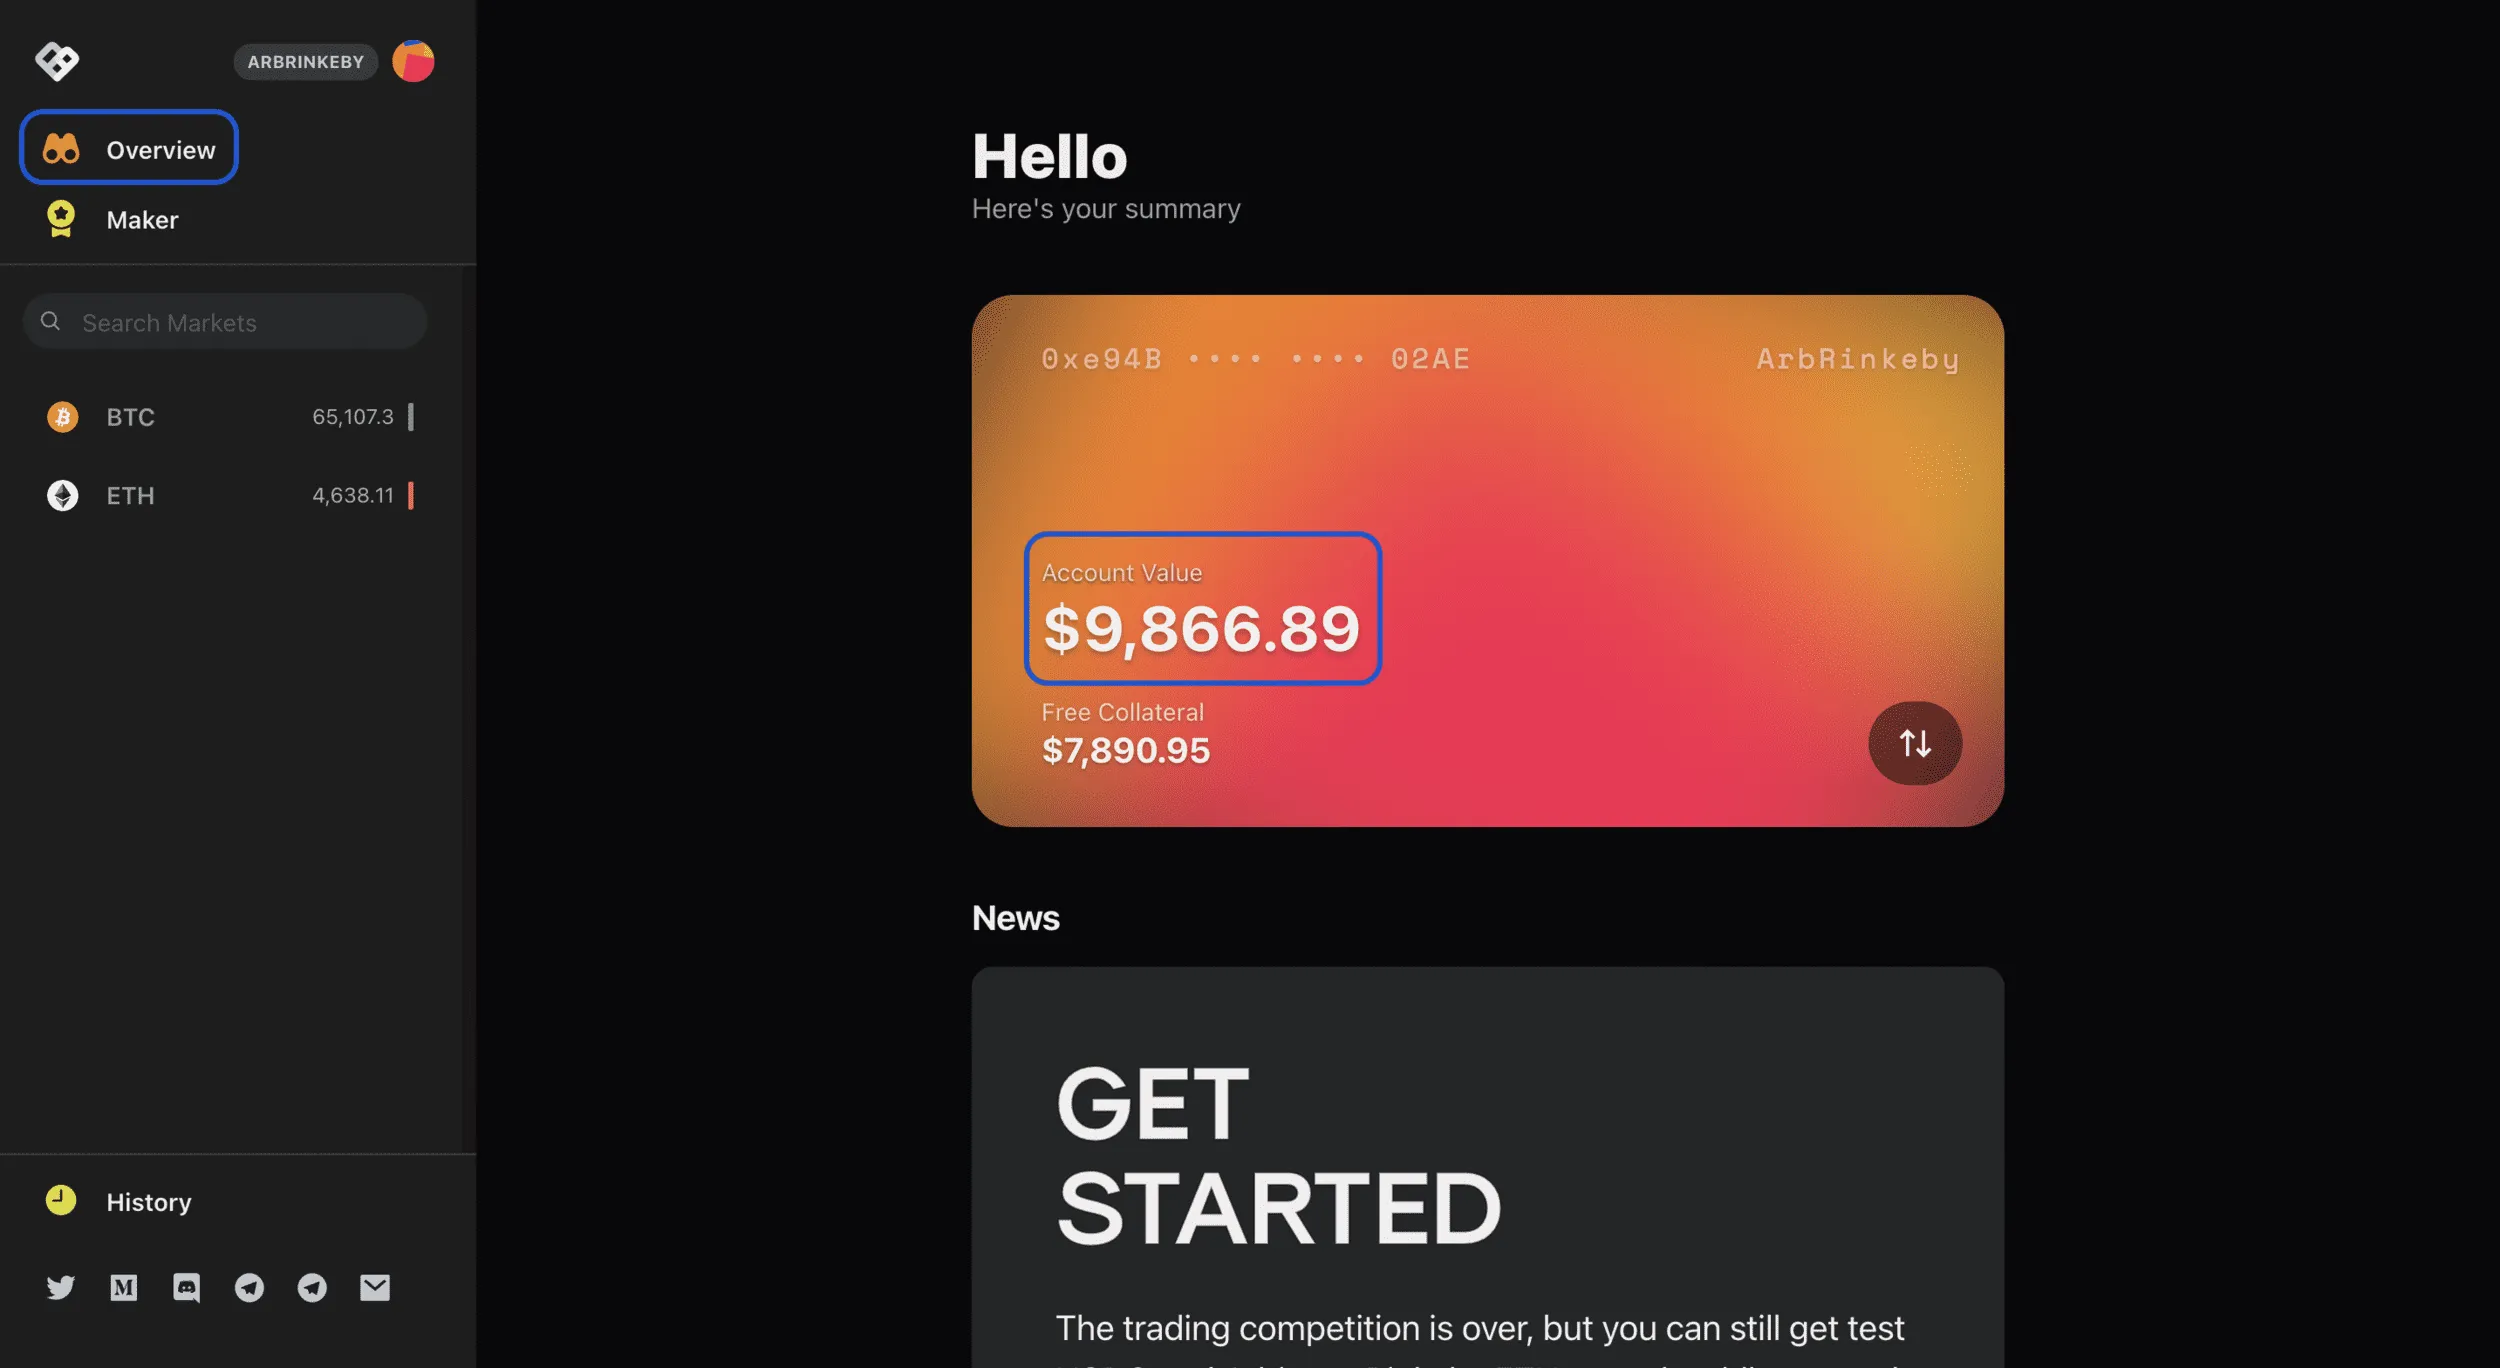
Double-check your Account Balance on the Overview page. This denotes how much you have deposited into the Clearing House and is available to trade.
This way, if you hold additional USDC in your Metamask, it won’t be considered until it is deposited into the V2 Clearing House.This is a good way to keep trading funds and portfolio funds separate.
Step 4 -
You are good to go. This is where I can’t help you. The market will make or break you, best of luck.
To open a long/short position head to the left-hand side and click the market you wish to trade-in. On testnet, there is only BTC and ETH available, but with the Perp V2 permissionless pools, the choice will be one of the largest of any futures DEX out there.
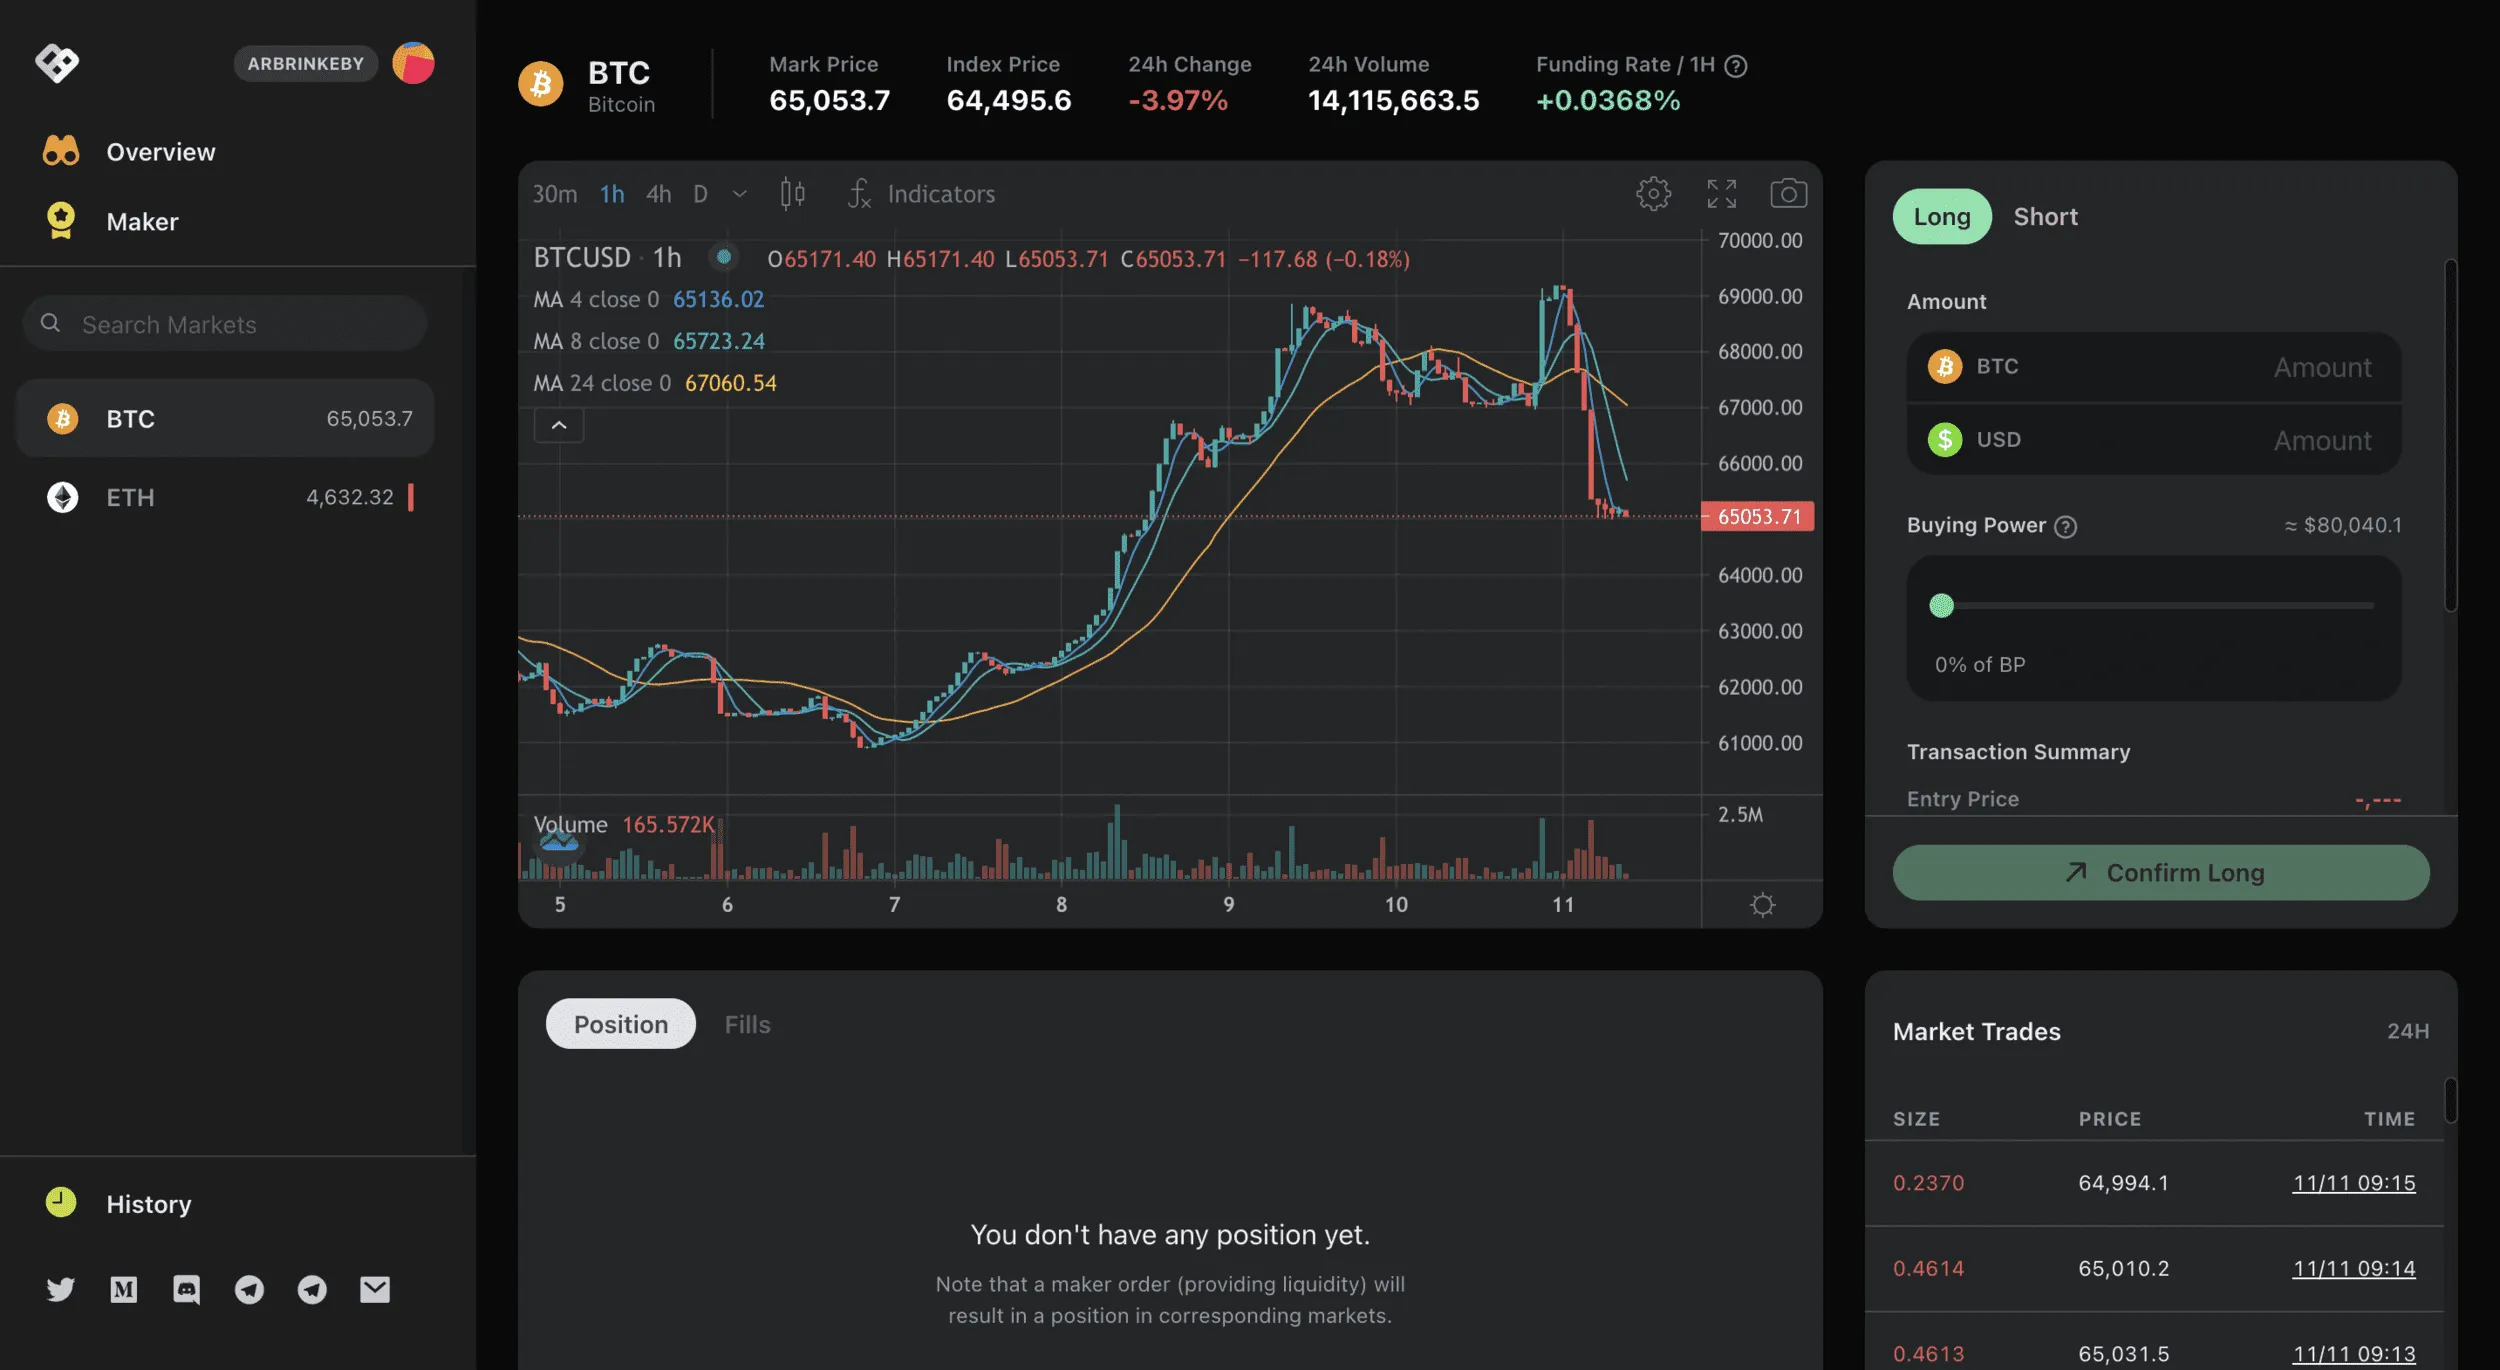
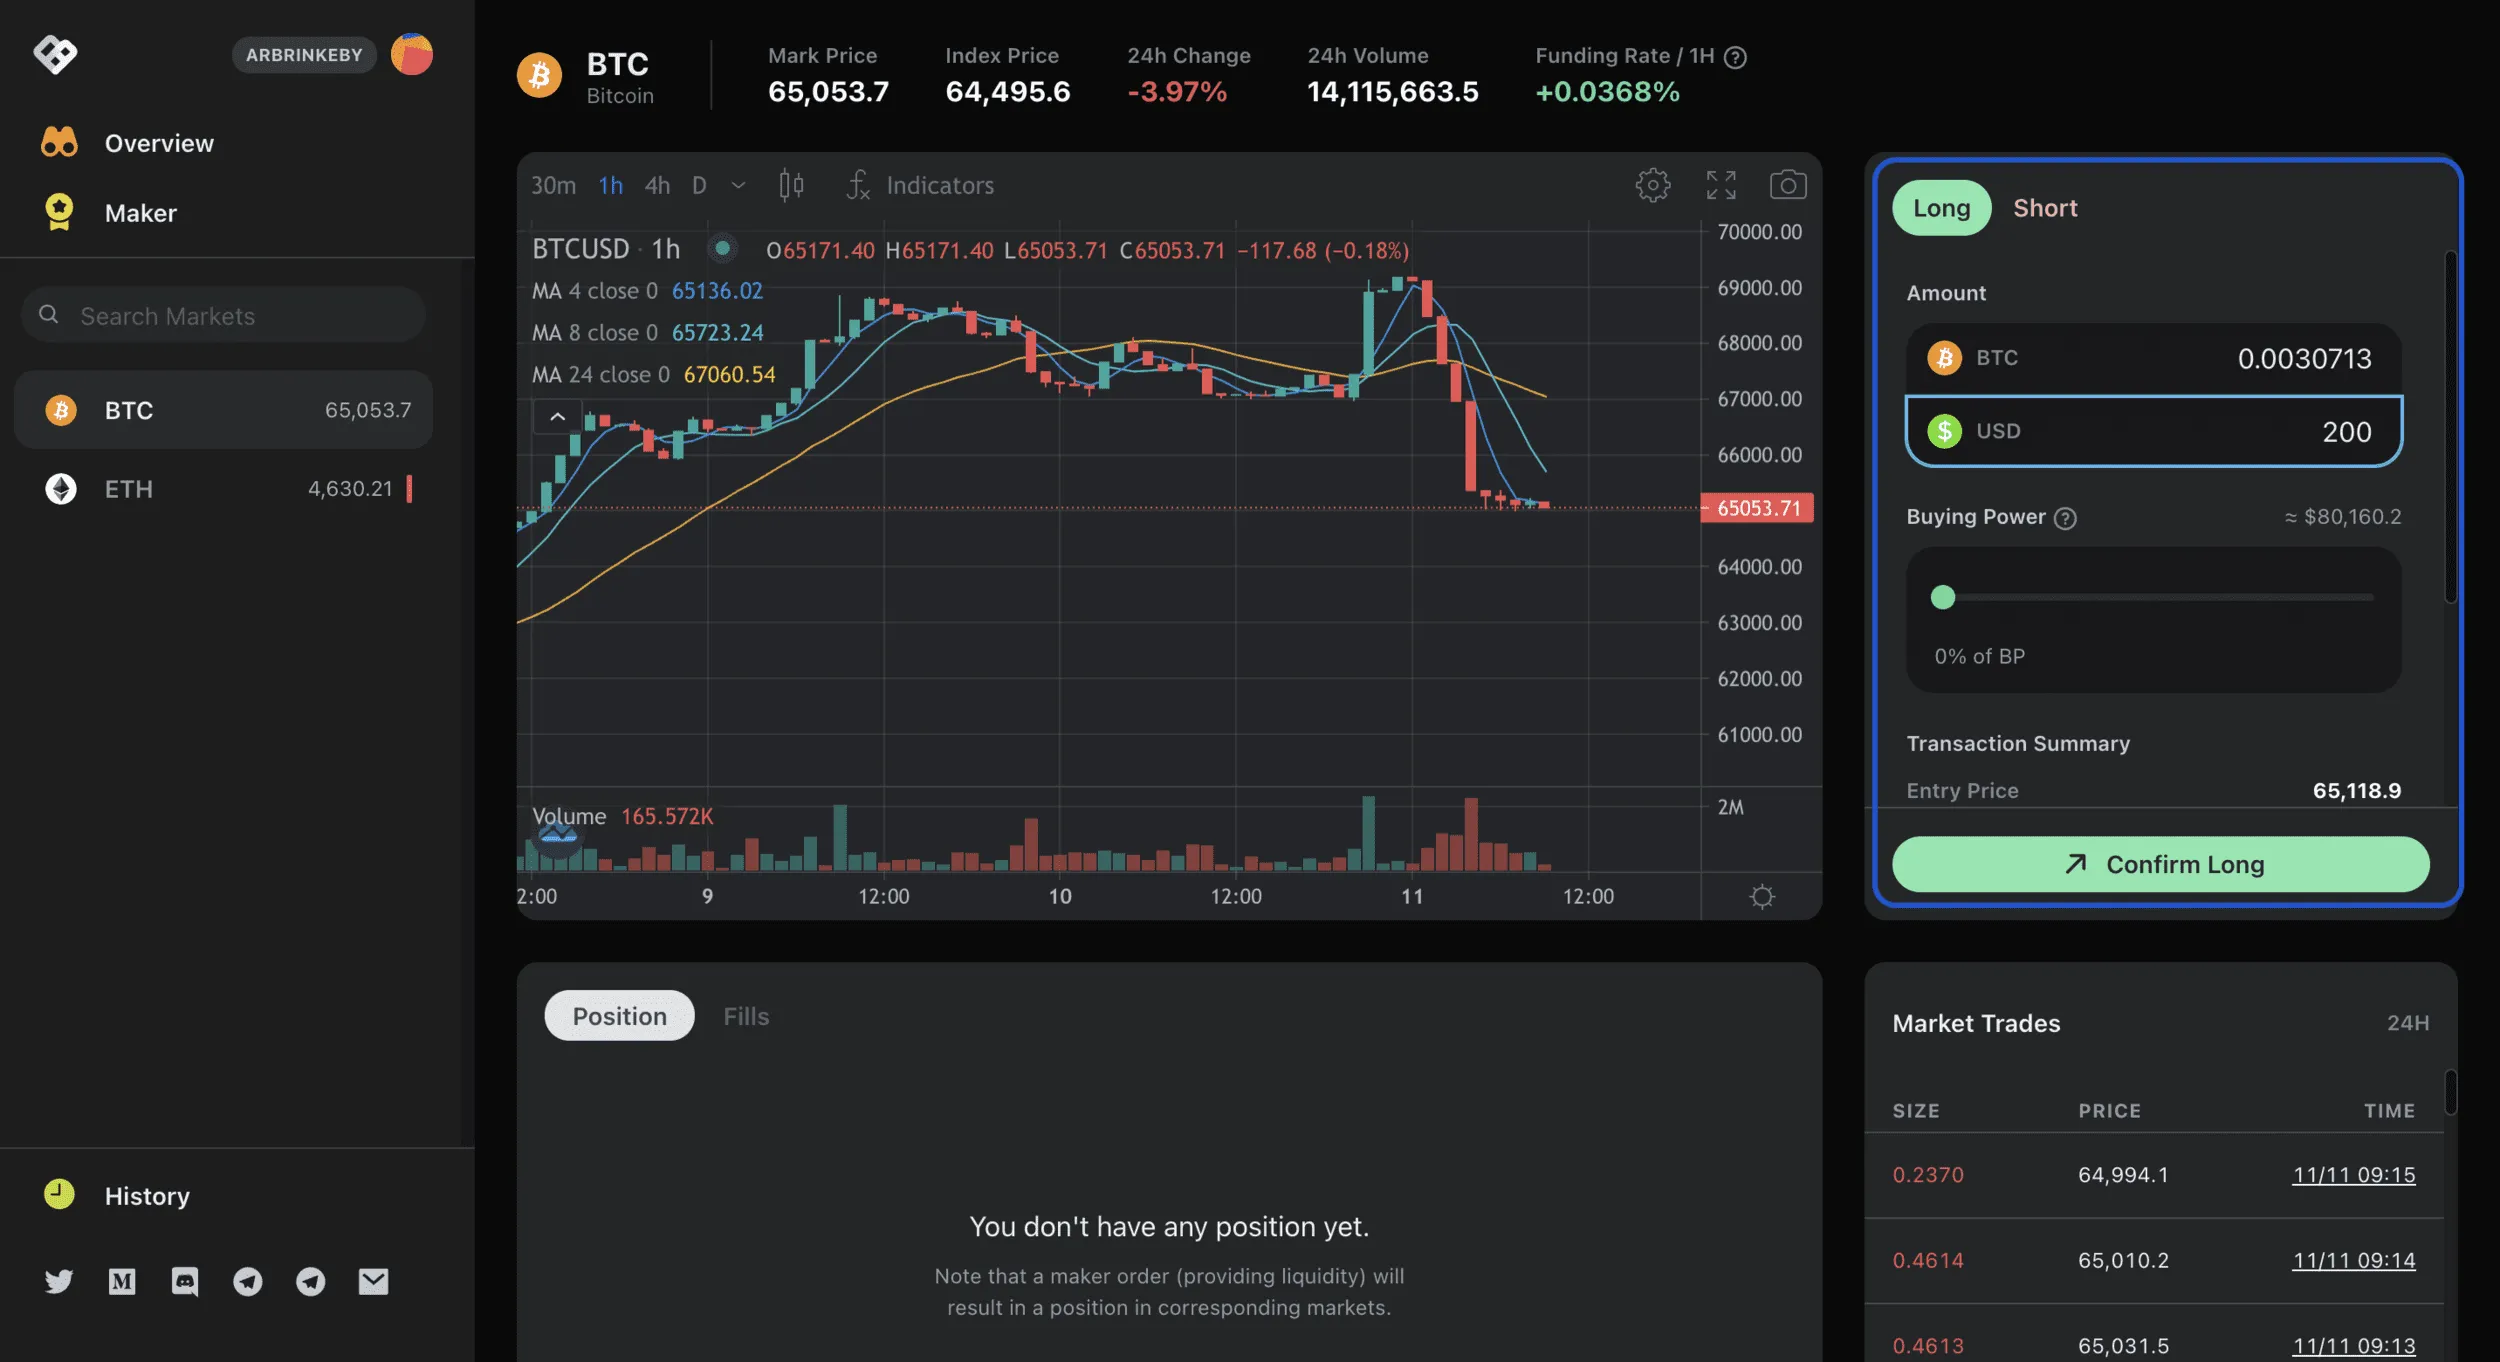
Now you have selected your market (BTC in this example), you can head to the right-hand side of the UI to prepare your entry.
Before we go into executing the order, let’s take a look at the UI and what all the aspects of it mean.
Going from left to right across the top of the chart we have -Mark Price - The price of the asset within the protocol created from buy and sell orders.
Index Price - This is an aggregated price of the underlying from the most liquid CEX. So, imagine that Binance, FTX, BitMEX etc all have oracle fed price data going in to create this aggregated price. This index price can then be used to determine the funding rate (more below).
24 Hour Change - Change in price of the perp asset, not the spot price.
24 Hour Volume - How much in, the notional volume of this market was traded that day. The notional volume would be the total position size. For example, a $100 trade at 10x would effectively be a notional position size of $1000. This is the value used to determine the trading volume of derivatives exchanges.
Funding Rate - If the derivative price is higher than that of the spot price of the underlying asset, then those in long positions pay those who are short. The same applies to a negative funding rate. This creates an arbitrage opportunity for those who take the other side of the trade and help converge the derivative price to the spot price.
Back to the tutorial…
Step 5 -
So once you have decided you have a great entry (don’t shoot from the hip), then you can type in the notional size of the position you wish to take.
Perp v2 uses the Buying Power slide bar if you are unsure.
So if you had $1000 deposited into the Clearing House, and you only want to open a $200 notional size position at 2x, then you can simply slide the bar until the leverage and notional size match your desired margin.
Step 6 -
Once you have confirmed the position in your Metamask, you will see the position open below the charting tool.

Here you will see your profit and loss, entry price, liquidation price, account margin ratio and account leverage.
What is important to note here is that in the testnet environment there are no limit orders. Once the V2 mainnet goes live there will be the option to set limit orders, use cross-margin and even multi-asset collateral.
Step 7 - If you are looking to close your position, this step couldn’t be easier. Simply hit close position and confirm the transaction in your Metamask.

Hopefully, you do a little better than me…
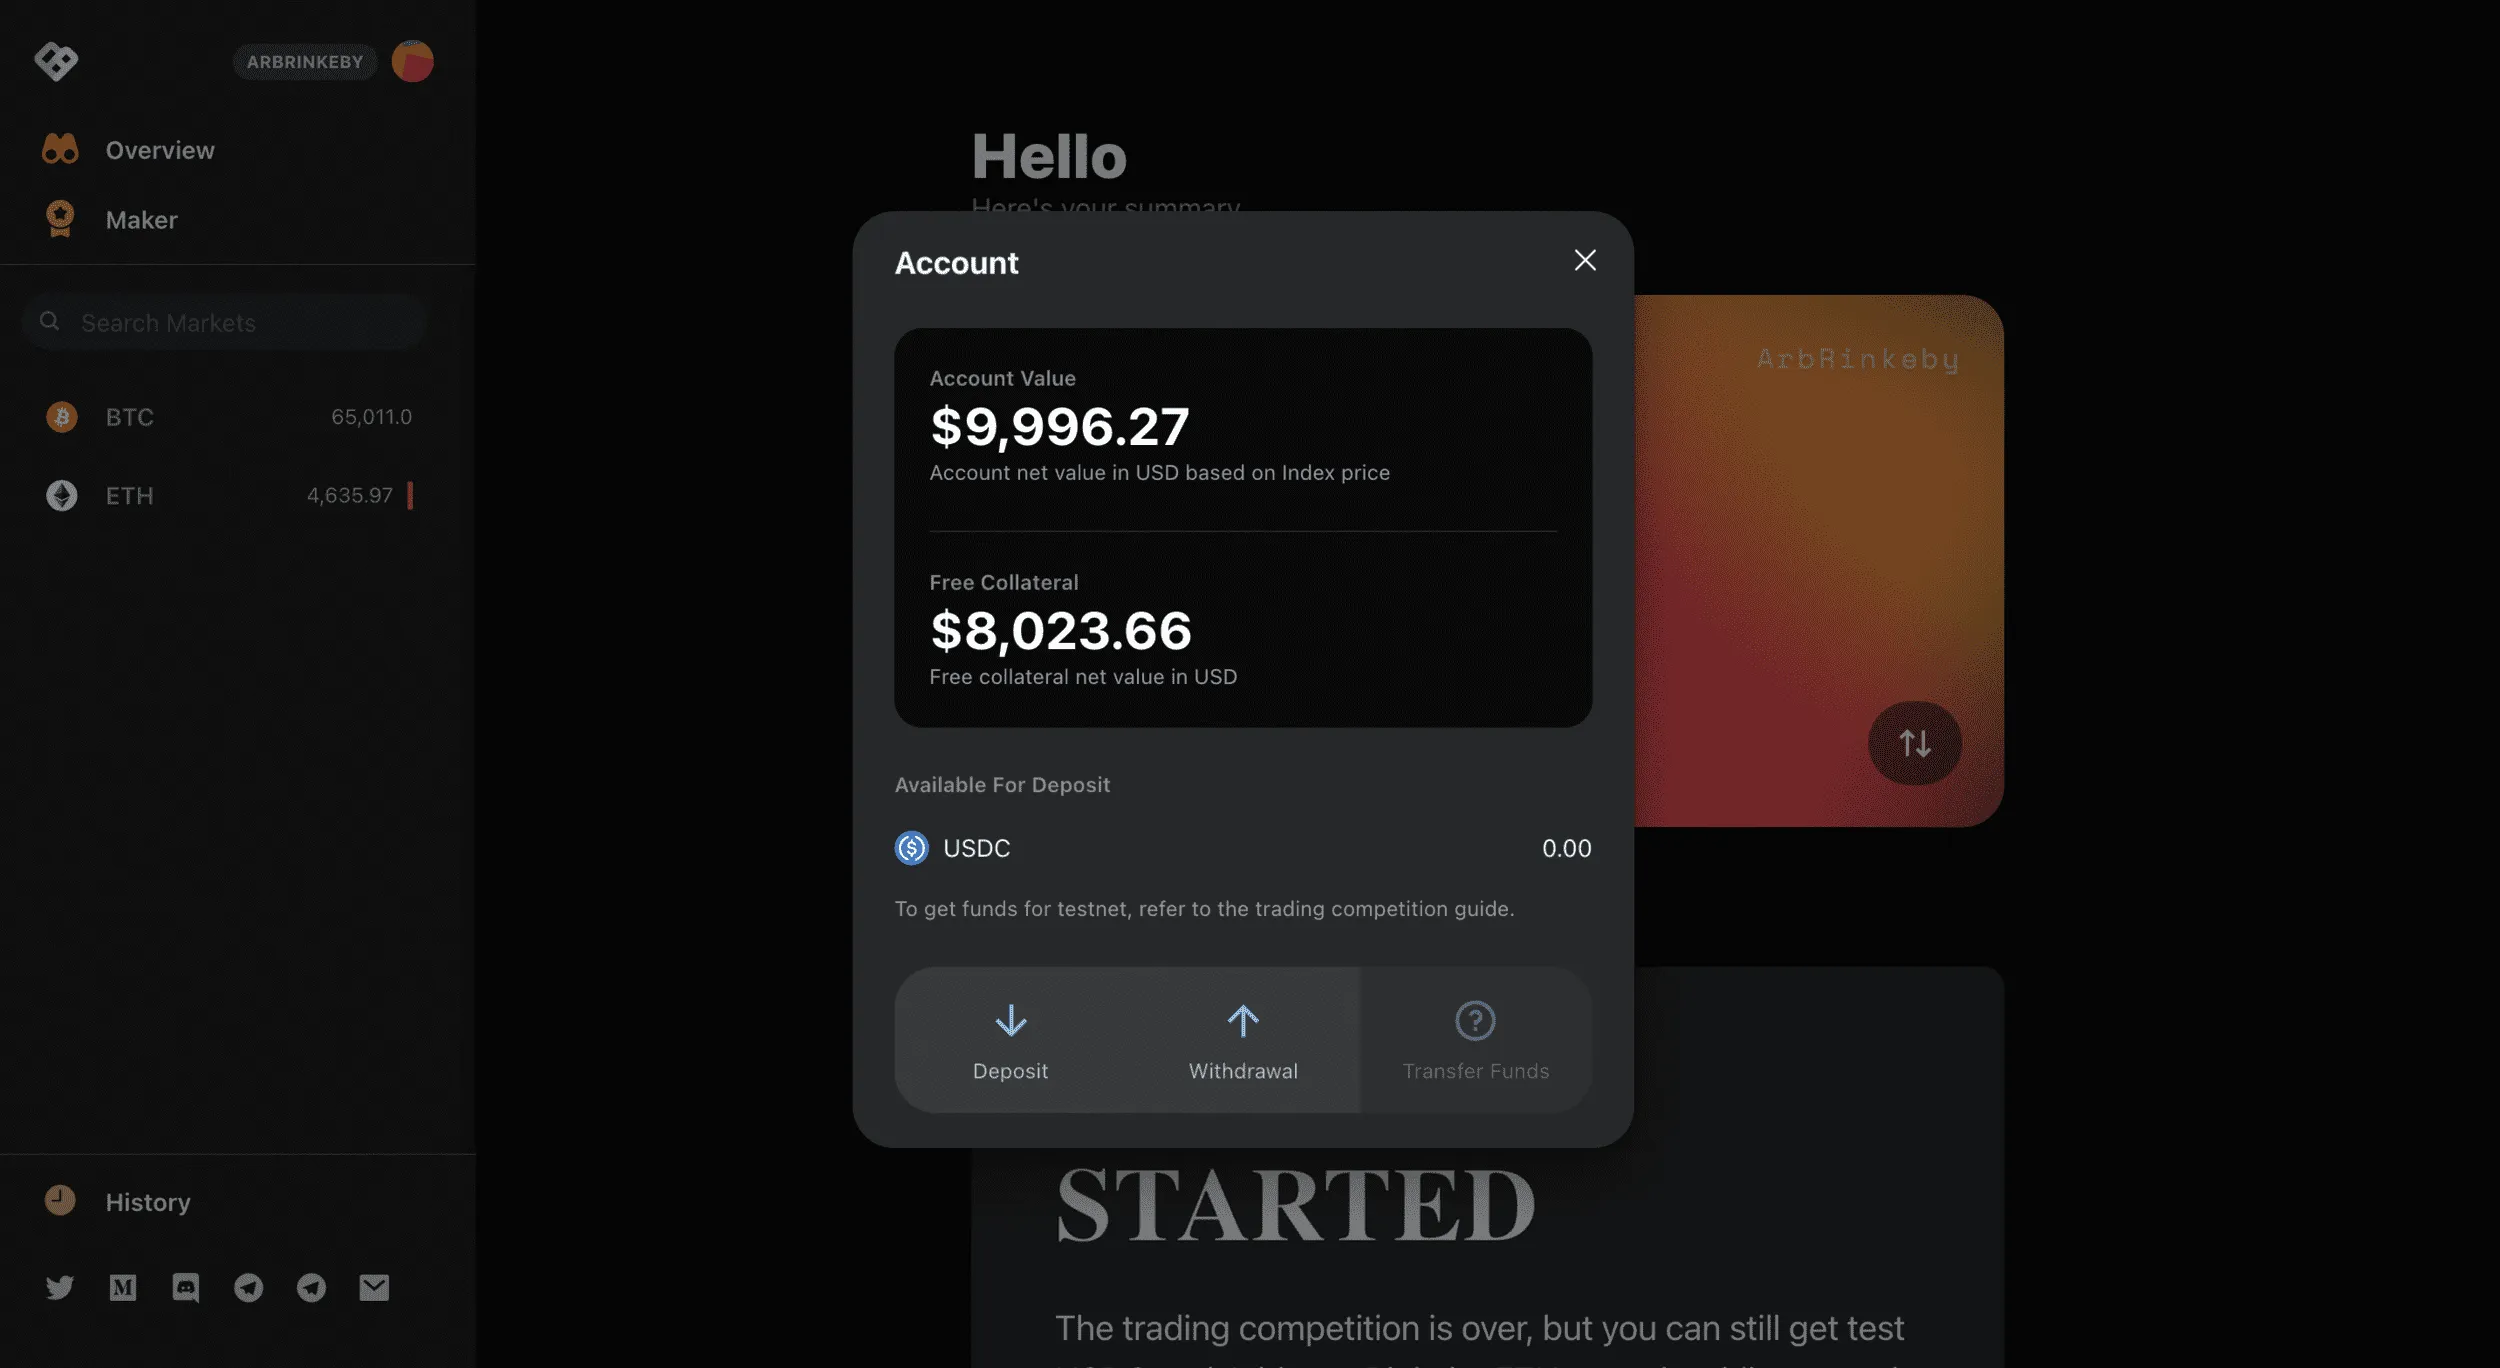
Step 8 - If you are then wanting to get your collateral USDC back into your Metamask wallet, you can simply head to the overview screen and click withdraw.
Market- Making Tutorial on Perpetual Protocol V2 -
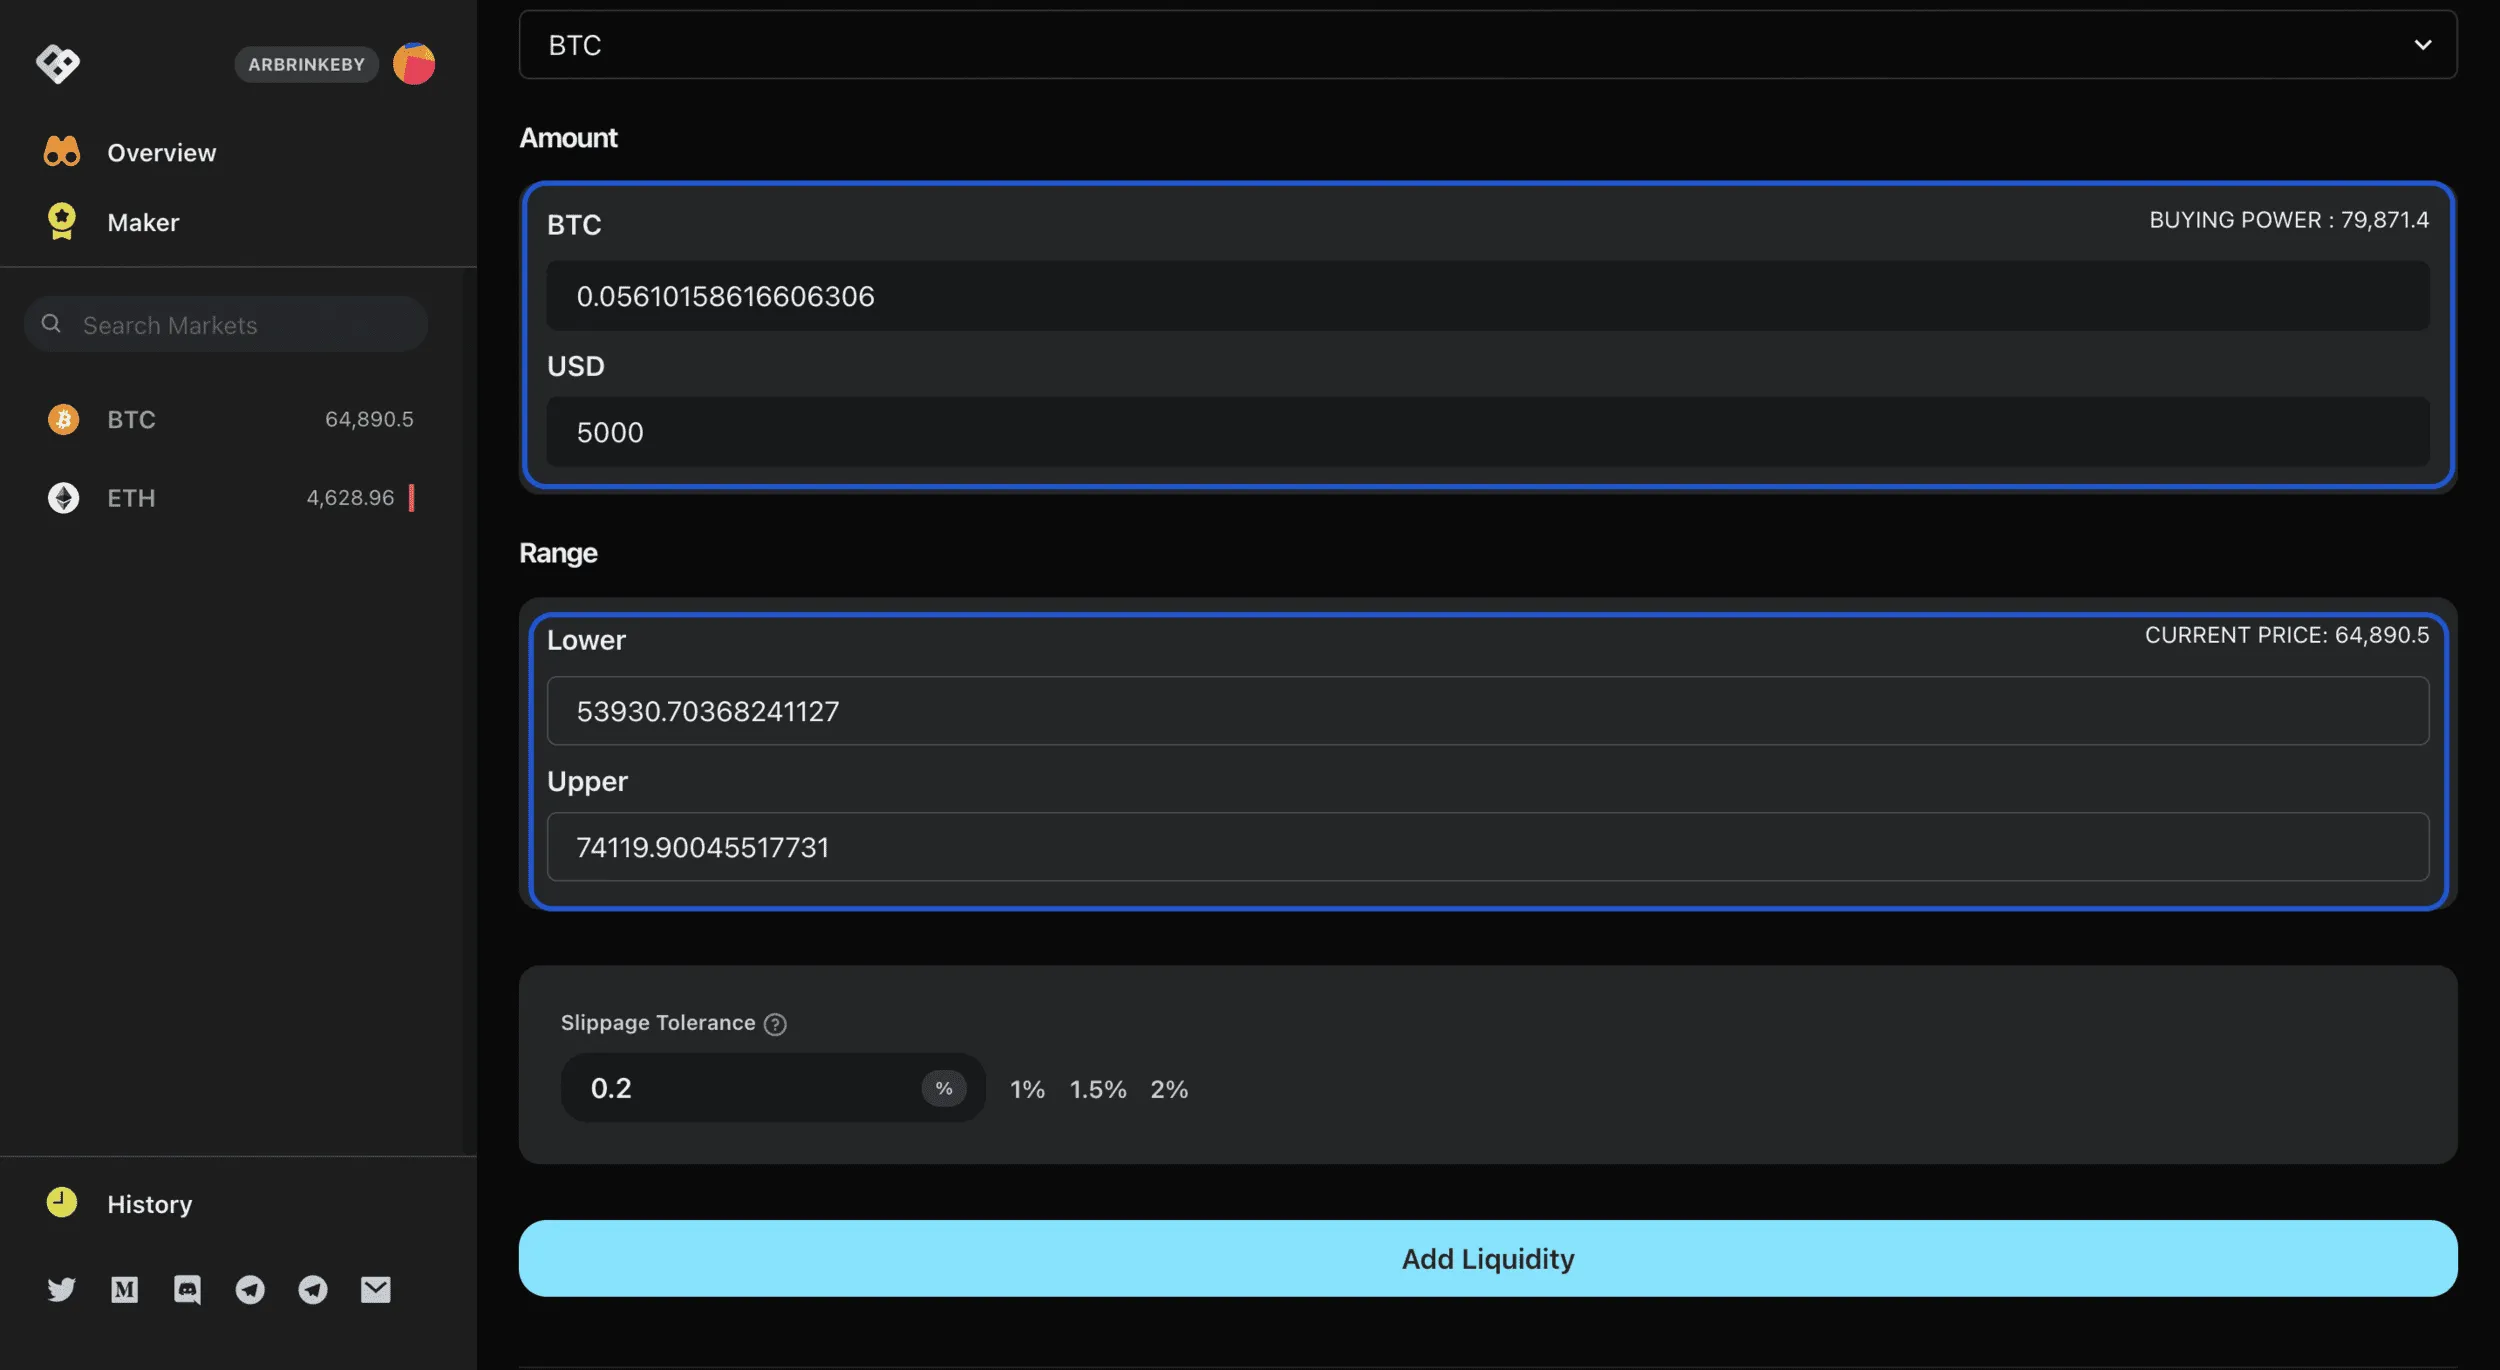
So, now we have gone through how to create and close a position on Perp V2, the following steps outline how you would become a market maker.
The beauty of Perp V2 is that users deposit USDC and effectively pick up an LP position in the Uniswap v3 pools. I will also write a full piece for market makers and takers for Per V2 which should be out next week or so.Head to the Maker tab.From here you can select the market you wish to become an LP for.From there you simply select the amount in USDC or the amount in asset value, you wish to provide as liquidity and then select the price range you wish to supply these assets.
If you are unsure about why you need to select a specific price range, this is because Perp V2 uses Uniswap V3 liquidity pools which allow users to supply assets in a concentrated range along the price curve.
I will go through the best ways to determine your assets range in the Market Makers article.
Once you have added liquidity for your chosen market, then you can sit back and earn the trading fees each time someone opens a long or short position on Perp V2, that is in your specific price range and market.
Summary -
So, that is about it for now… Once Mainnet goes live, I will update the article with more recent links and remove the Testnet information. There will be additional features rolled out over time too so I will make sure to add these in as and when they come around. I’d highly recommend trying the testnet out and seeing for yourself how much of a perfect fit layer 2s are for on-chain leverage trading. It feels like you are on a CEX and it is kind of weird, in a good way. Honestly, I don’t see users going back to a traditional exchange once this is rolled out, it wouldn’t make sense.

Also if you do want to start using Perpetual Protocol and also want to support us here at blocmates, you can simply click the image above to “sign up” with our referral link, thank you if you decide to do this!
If you like this kind of content and would like to have a chat about me writing something similar on a project you like or are a part of just give me a DM on Twitter or hit me up @blocmates on Telegram.










.webp)

.webp)
.webp)

%20(1).webp)




















%202.webp)


.webp)

.webp)
.webp)
.webp)


.webp)




.webp)
.webp)

.webp)
.webp)
.webp)


.webp)
.webp)


.webp)


.webp)




.webp)


.webp)


.webp)







.webp)


.webp)









.webp)

.webp)
.webp)

.webp)







.webp)

.webp)


.webp)




.webp)
